So this is possibly our last blog entry before we're off to Cambridge with Zyderbot, ready or not. I'm sure we'll take part in everything anyway but this is where we're at right now.
So we had to make a video, I suppose we could have done it weeks ago but even though it's one of the challenges, somehow it doesn't feel like it. This blog has been going since last September, but even so, it still feels more real.
Two of us got together in the kitchen with an old camera (well, old for modern times, it was still digital!!!) and with a basic script took turns to operate the camera and do some impromptu words about Zyderbot. We aren't natural publicists so we're a bit awkward, but it's done.
The video became an explanation of some of the key points, with added picture within picture to provide voice over explanations of key points, this picture showing the emergency fuse to prevent magic smoke emissions.
While it's a competition and we want to compete in all the challenges, we have to enjoy doing it, and the real competition is solving the puzzles we're given. The rest of the pictures here are all from the video of some things we've learnt.
Nerf guns and Stepper motors
Being geeks we had nerf guns, but adapting the mechanism for use in PiWars turned out to have a range of issues. But here it is in all its chaos. Eventually all that is used from the gun is the flywheel acceleration module, and the dart magazine.
We had some fun with the aim of the gun, and have fitted a recycled barrel to increase accuracy. The barrel was originally a croquet mallet handle, which then became a battery holder in a previous Zyderbot iteration, and now a nerf gun barrel. You can just see a cat toy laser clipped on underneath.
The flywheel module of the original gun was easily unscrewed and was easy to remount.
The trigger mechanism wasn't so easily recreated and we ended up using a stepper motor to push the darts into the flywheels.
Lesson learnt, do not power stepper motors continuously when not in use. So it was left powered on, heated up and shortly the plastic mount for it melted. Replaced with a metal mount and a change to code in a float state when not actually in use.
Magnets
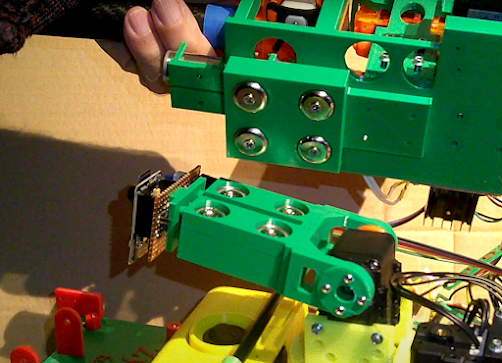
We use a lot of magnets for quick assembly and disassembly of Zyderbot between challenges. Here is the main arm which is reused between the Eco-Disaster and Zombie Apocalypse challenges. The base is attached to the robot rear using a pair of magnets at each corner which gives a very secure base.
Four magnets on the arm allow for holding the zombie gun and barrel handling attachments
Four on the attachment line up
And fully assembled with four matching magnets it's a secure joint.
The nerf gun similarly has four matching magnets
And so has a very secure platform.
Lesson learnt. You don't need four matching magnets for everything. The magnets are strong enough to hold using just a metal washer on one side and magnet on the other. We fitted four pairs to the battery box and now need a crowbar to get it open. They're also not always cheap so it costs twice as much!
Barrel Handler
One of the things we want to avoid in Eco-Disaster is to have barrels rolling around the arena. Partly because they'll be difficult to get into the end zones, and also because they'll potentially get caught under Zyderbot and need a rescue.
Consequently, last minute mods to the barrel handler to add a plough to push barrels away that accidentally get in the way. This means not lifting the barrels very high, but then also not having to worry about dropping them on another barrel, though stacking them would be an interesting challenge (a la toys). We've also fitted a rear bumper to do the same thing.
ConfigurationZyderbot has a set of 8 dip switches on the rear which allow easy configuration between challenges.
Also shown in the picture is the battery monitor display, the rear light and the stop/start button. The rear light also doubles as an information display. For the Pi-Noon challenge we'll be covering this with a magnetically attached plate to protect the settings!!!!
Ultrasonic sensor
Lots of us will recognise a HC-SR04 ultrasonic sensor, so we couldn't miss one off, it's very easy to use and adds a bit more of a feature than a 5mm square laser sensor on pcb, though we're using one of those as well!!! Might come in for barrel detection as well.
Lighting
We have very little idea of what the lighting will be like on the actual day and most of our testing has been done in very variable conditions, so having a pair of headlights on the robot helps a lot in colour and line detection.
It's also part of the robots image, we can't have a lightbar because of the attachments but these will work well.
Might actually do a blog of the weekend but we'll see how excited we are :)
Well that's this bit done, just the competition itself, then back to building and demonstrating other robots, but I'm sure we'll find a place for Zyderbot!


No comments:
Post a Comment